How To Tile A Bathroom Wall Step By Step

How To Tile Around A Tub Bathrooms Remodel Diy Bathroom Bathroom Redo

Standard Height Tile On 9 Walls Bathroom Wall Tile Tile Tub Surround Tub Tile

Learn How To Tile A Bathroom Wall With The Detailed Step By Step Instructions And Tips In This Diy Tiling Guide Diy Bathroom Diy Home Improvement Home Repairs

Complete Guide On How To Tile A Shower Wall And Floor Diy Projects Bathroom Bathroom Tile Diy Diy Tile Shower

Complete Re Do Of My 80 Main Bath Let The Demo Begin White Bathroom Tiles Bathroom Wall Tile Bathrooms Remodel

Part 1 How To Install Tile On Shower Tub Wall Step By Step Youtube With Images Diy Tile Shower Shower Tile Tile Around Bathtub

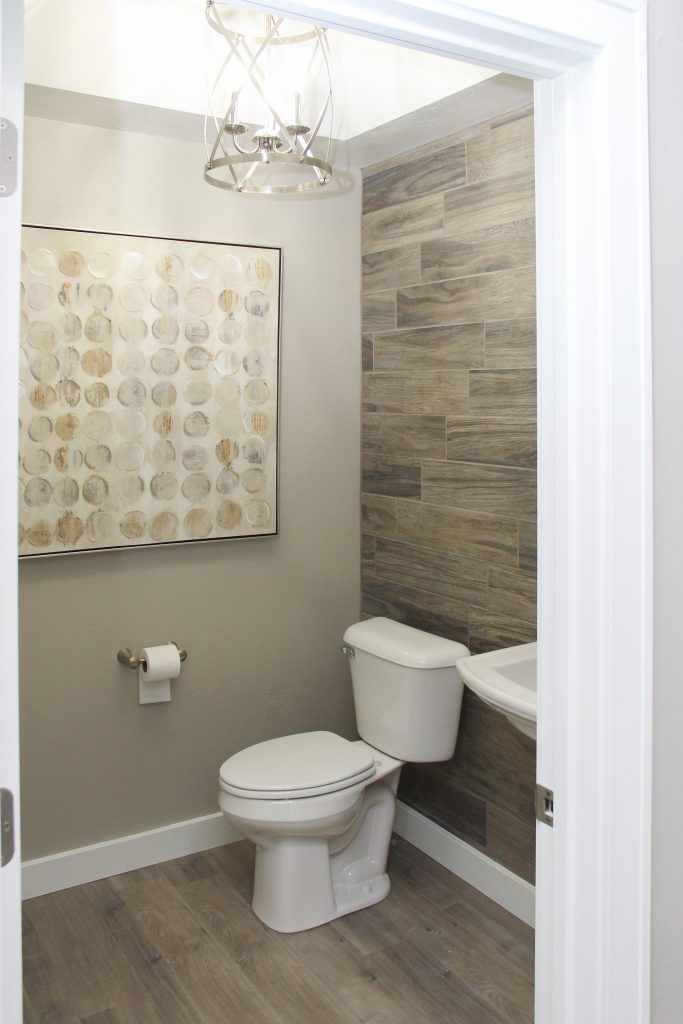
This will indicate the size of the tiles you will need at each end.
How to tile a bathroom wall step by step.

How To Retile A Shower Bathroom Tile Diy Shower Remodel Bathroom Shower Tile

3 Steps To Add Trim And Borders To Diy Shower Wall Panels Shower Wall Panels Acrylic Shower Walls Shower Wall

How To Install Wall Tile In Bathroom Howtospecialist How To Build Step By Step Diy Plans Bathroom Wall Tile Bathroom Wall Diy Bathroom Remodel

How To Install Bathroom Wall Tiles Bathroom Wall Tile Diy Bathroom Remodel Budget Bathroom Remodel

How To Tile Bathroom Walls And Shower Tub Area Bathroom Wall Tile Bathroom Makeover Tile Bathroom

How To Tile A Bathroom Shower Walls Floor Materials 100 Pics Pro Tips Diy Tile Bathroom Shower Walls Shower Wall

Shower Pans Shower Bases Barrier Free Low Step Shower Bestbath Farmhouse Shower Bathrooms Remodel Blue Bathroom Tile

This Step Up Shower Features Our Classic Stone Look Brixton Tile Collection Bathroom Design Bathroom Floor Tiles Bathroom Renovations

Instructions To Retile A Bathroom Wall Wood Tile Bathroom Tiny House Bathroom Patterned Bathroom Tiles

Explore Bathroom Tile Ideas On Pinterest See More Ideas About Bathroom Tile Ideas Small Half Bathroom Remodel Shower Shower Remodel Small Bathroom Tiles

Pin By Drea Goebel On My Own Diy Bathroom Remodel Diy Bathroom Diy Bathroom Decor

3 Steps To Add Trim And Borders To Diy Shower Wall Panels Stylish Bathroom Shower Wall Panels Bathroom Shower Panels

Step Ladder Herringbone Pattern Subway Tile Pattern Ideas Construction2style Patterned Bathroom Tiles Subway Tile Patterns Shower Tile

Tile Around Bathtub Ideas Bathroom Tiled Tub Wall Full Tile Around Bathtub Bathroom Wall Tile Bathtub Ideas Bathroom

The Tile Shop Page Not Found Beige Tile Bathroom Beige Bathroom Bathroom Color Schemes
Diy Stone Wall Tutorial Guest Bathroom Small Small Half Bathrooms Half Bath Remodel

3 Tips How To Mix And Match Tiles Tile Bathroom Top Bathroom Design Bathroom Wall Tile

A Color Story Blue The Tile Shop Blog Blue Bathroom Tile The Tile Shop Shower Remodel
Https Encrypted Tbn0 Gstatic Com Images Q Tbn 3aand9gcs8p8l6agjqxj9kqmcqlvlueockdcac7twfw2l3fz4cmdhv4he3 Usqp Cau

Image Result For Step Down Into Bath Shabby Chic Bathroom Bathtub Remodel Small Bathroom

Bathroom Shower Wall Tile New Haven Glass Subway Tile Bathroom Shower Walls Small Bathroom Tiles Bathroom Wall Tile Design

Schluter Trim On Edges Of Shower Pony Wall Tile Bathroom Bathroom Layout Small Bathroom Remodel

Step Down Shower Tile Bathroom Shower Remodel Bathroom
Laminate Bathroom Wall And Flooring Bathroom Accent Wall Tile Accent Wall Tile Accent Wall Bathroom

Shiplap Wall Arabesque Floor Tile Anthropologie Hooks Tile Bathroom Bathroom Bathroom Flooring

How To Refinish Outdated Tile Yes I Painted My Shower Painting Bathroom Tiles Bathroom Repair Painting Bathroom

Shower Floor Built In Seat And Pony Wall Storage Niche Bath Design Remodelin Bathroom Remodel Shower Bathtub Bathroom Remodel Tile Bathroom Remodel Shower

10 Best Colorful Bathrooms Bathroom Tile Designs Bathroom Colors Bathroom Wall Tile

Toledo Tile Stencil In 2020 Brown Tile Bathroom Floor Makeover Bathroom Wall Tile

Almost Finished Setting Tiles On Shower Walls And Ceiling Shower Tile Shower Ceiling Tile Ceiling Tiles Bathroom

3 4 Up Wall Tile Jack And Jill Bathroom Bathroom Wall Tiles

Home Depot Dove Gray Arabesque Tile Bathroom Wall Home Depot Bathroom Arabesque Tile Bathroom Small Bathroom Tiles

Living Room Pinterest Decor Gorgeous Step In Shower With Handmade Fire Clay Subway Tile Laid In A Herr In 2020 Subway Tile Showers Bathroom Interior Design Shower Tile

Shower Tile Shower Tile Bathroom Wall Tile Tile Bathroom

Pin By The Tile Shop On Bathroom Tile Travertine Shower Travertine Tile Bathroom Shower Tile

Tiling Inside Corners Ceramic Tile Advice Forums John Bridge Ceramic Tile 1 16th Gap Shower Wall Shower Tile Bathroom Shower Walls

Toilet Tiles Design Bathroom Wall Tile Design Simple Bathroom Wall Tiles Design

Small Spaces Can Be Glam Too In 2020 Bathroom Makeover White Bathroom Tiles Bathroom Trends

Artistic Tile Is Proud To Have Partnered With Studio Dbon This Year S Kips Bay Decorator Showhouse Their Room S Artistic Tile Bathroom Wall Tile Luxury Tile

Easiest Way To Remove Bathroom Wall Tiles Bathroom Wall Tile Tile Removal Tile Bathroom

Feng Shui Home Step 3 Bathroom Decorating Secrets Timeless Bathroom Bathroom Makeover Bathroom Design

Bathroom Shower Tile Glass Subway Tile On Walls With Small Floor Tiles Description From Pinterest C Glass Tile Bathroom Wall Glass Tile Bathroom Shower Tile

Shower Box Ideas Shower Niche Ideas Bathrooms Perth Perth Bathroom Renovators Border In Shower Box
Https Encrypted Tbn0 Gstatic Com Images Q Tbn 3aand9gctsc6dymrbgk0huoqlzohdtzffaejaqg0t5rdhibwytphi3sne3 Usqp Cau
Source : pinterest.com
