How To Shingle Hip Roof Shed

How To Build A Hip Roof Hip Roof Gazebo Roof Roof Framing

How To Build A Hip Roof Hip Roof Design Roof Design Hip Roof

12 12 Hip Roof Shed Plans Blueprints For Crafting A Square Shed Roof Framing Hip Roof Shed Plans

How To Shingle A Roof 90 Pics Pro Tips Recommendations Diy Roofing Roof Repair Roofing

Framing A Dutch Roof Dutch Gable Roof Roof Framing Hip Roof

12 12 Shed With Hip Roof Plans Diy Shed Hip Roof Shed

The difference is in the amount of ridge capping you need and the amount you will waste.
How to shingle hip roof shed.

10x10 Hip Roof Garden Shed With Pine Board Batten Siding Shutters Rounded Wood Single Door Cedar Shake Roof And Cupola Hip Roof Roof Design Shed Roof

Building Ideas Hip Roof Flat Roof Shed Modern Roofing

14 Easy Ways To Facilitate Shingle A Hip Roof Shingle A Hip Roof Hip Roof Roof Shingles Shingling

12 X 24 Wood New England Hip Roof Shed Hip Roof Flat Roof Shed Roof Design

How To Build A Lean To Shed Complete Step By Step Guide Lean To Shed Lean To Building A Shed

Hip Roof Dormered Three Car Carriage House Shed Dormer Hip Roof Modern Roofing

Hip Roof Truss Google Search Hip Roof Hip Roof Design Metal Roof Installation

Hipped Roof Garage The Wooden Workshop Oakford Devon Hip Roof Cedar Shingle Roof Wooden Garden Buildings

Pin On Outdoor Shed

Example Of 2 Car Detached Garage With Hip Roof Garage Plans Detached Basement House Plans House Plans Farmhouse

Pin On Storage Shed

Hip Roof Sheds For Sale Flat Roof Shed Modern Roofing Hip Roof

Hip Roof Shed Architectural Shingles Sheds For Sale

8 X8 Hip Roof Garden Shed With Transom Window In Single Door And Cedar Shake Roof Hip Roof Roof Shingles Fibreglass Roof

Hip Roof Shed Plans Photo Gallery In 2020 Hip Roof Shed Shed Plans

10 X20 Stucco Hip Roof Garden Shed Visit Our Website At Www Lappstructures Com For More Information Or To Place Shed Backyard Structures Historic Structures

This Cupola Is The Last Touch On This Beautiful Hip Roof Shed Shed Hip Roof Roofing

19 Fabulous Roofing House Japan Ideas Hip Roof Roof Styles Modern Roofing
Https Encrypted Tbn0 Gstatic Com Images Q Tbn 3aand9gctrihntc5lry Lyb26ktdtbysagatqvcdtktiagqujrow19g0gb Usqp Cau

10 X 14 Laurel Hip Shed W Crown Molding Facia Vinyl Siding Shed Hip Roof Backyard

Garden Hip Roof Shed Garden Storage Shed For Sale Garden Storage Shed Shed Sheds For Sale

Stoltzfus Structures Photo Gallery Shed Backyard Storage Sheds Hip Roof

Roof Types Barn Roof Styles Designs Roof Styles Roof Design Fibreglass Roof

Learn How To Build A Roof For Your Shed On Your Own Complete Step By Step Guide And Instruct In 2020 Roof Shapes Building Roof House Roof
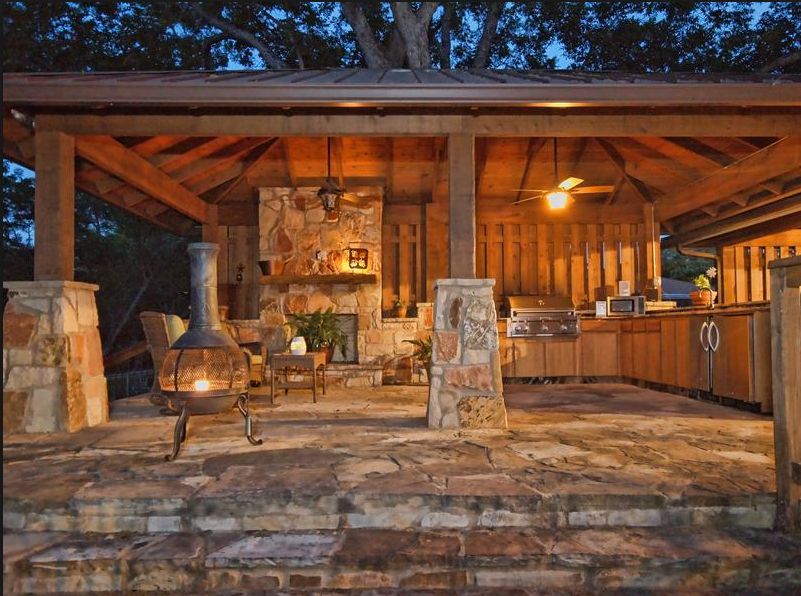
Hip Roof Pavilion With Outdoor Kitchen Pavilion Design Modern Roofing Outdoor Space Design

Is Roofing Felt Necessary On A Shed Roofing Felt Roofing Shed

Hip Roof Pool Houses Pool House Pool House Plans

Simple Hip Roof Portico With Tongue And Groove Interior Ceiling Portico Design Front Porch Design House With Porch
12x16 Hip Roof Shed Roof Design Hip Roof Design Hip Roof Shed Roof Design

1 1 2 Story 20x34 Cabin Porch Remodel Porch Design Facade House

Image Result For Addition To Hip Roof Hip Roof Garage Addition House Roof

Hip Roof Section Google Search Fibreglass Roof Roof Architecture Roof Framing

Roofing Ideas Replace Any Missing Shingles As Soon As You Notice That They Have Come Loose One Missing S Building A Porch Porch Design Porch Roof Design

How To Keep Your Roof In Superb Condition Gambrel Roof Roofing Gambrel

12x16 Shed Dormer Plans Myoutdoorplans Free Woodworking Plans And Projects Diy Shed Wooden Playhouse Pergola Bbq In 2020 Shed Diy Shed Wooden Playhouse

How To Build A Storage Shed 14 X 20 Reverse Gable Roof Style Design D1420g 610708152224 Ebay Building A Storage Shed Roof Styles Fibreglass Roof

This Step By Step Diy Project Is About 10 16 Saltbox Shed Roof Plans This Is Part 2 Of The 10 16 Storage Shed Where I Show

Mastering Roof Inspections Roof Styles Internachi Mansard Roof Roof Styles Roof Inspection

Pin On Garage Ideas

Http Sacramentoappraisalblog Com 2010 07 01 Flat Vs Hipped Roof What Is Your Vote For This Sacramento House Roof Design Hip Roof Flat Roof

Hip Roof Shed Manufacturers Plans And Design Stoltzfus Structures Backyard Storage Sheds Shed Backyard Storage

10x16 Hip Roof Garden Shed With 8 Wall Upgrade Painted Prehung Transom Door Flower Boxes Shutters 21 Cupola An Hip Roof Green Roof System Fibreglass Roof

How To Install The Gambrel Shed Roof Shingles Gambrel Shed Plans Shingling
Https Encrypted Tbn0 Gstatic Com Images Q Tbn 3aand9gctr Husjqo6p Fanztbmwjkdna5 Ojmhuggwappcwqyn1nngxyn Usqp Cau
Source : pinterest.com
